How to create a backend without programming using WSO2


A project I’ve worked on had a pretty special requirement. It had to be maintainable long-term by non-developer people. Also, there were some specific features like SAP integration, IDoc communication and analytics.
WSO2 is “The Open Source Technology for Digital Business”. It consists of many individual components but the most interesting for me was Enterprise Integrator. It basically allows you to create a backend connected to almost any database. Everything with just a web user interface (“Design View”). Demanding type of user can make some steps quicker and easier because “Source View” with XML is also available.
Although web UI exists, the recommended approach is to use “WSO2 Developer Studio” which is basically Eclipse with special plugin installed. The main advantages are that you can use version control for your files and also export your project into one file which can be imported using web UI.
WSO2 has a robust documentation but it’s based only on one specific example, some information is incorrect and also there is a mix of examples for web UI and Developer Studio (some can be found for one and some for the other) so I decided to summarize the most important steps of creating REST API into tutorial below and save your time and some troubles.
Tutorial
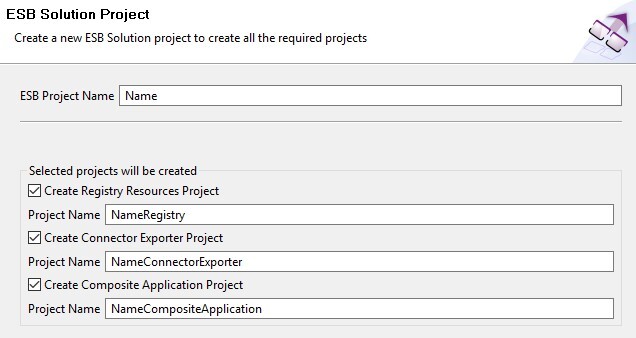
1. Create project in Eclipse
File — New — ESB Solution Project
This creates “Carbon application” which can be exported into *.car file.
2. Create project in Eclipse
File – New – Project... – WSO2 – Service Hosting – Data Service Project
The same location, named NameDataServiceProject.
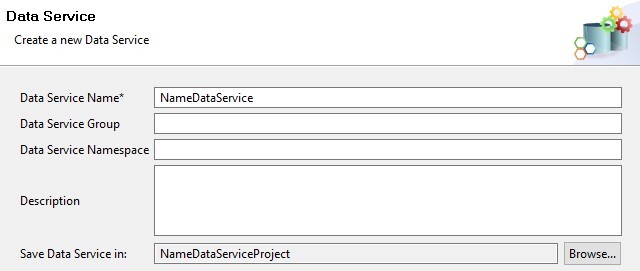
3. Create data service
Right click on the NameDataServiceProject and create New — Data Service. This is basically a database connector.
4. Configurate data source
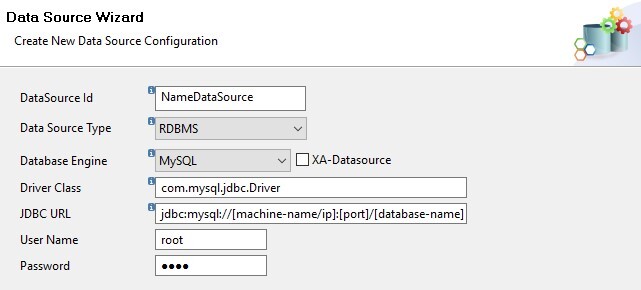
Request
1. Create query
It’s difficult to create query through UI but it has really simple syntax in XML so at the bottom switch from “Outline” to “Source”.
It’s a sibling of <config> in XML.
<query id=”GetJobDetailQuery” useConfig=”NameDataSource”>
<sql>SELECT * FROM job WHERE id=?</sql>
<result outputType=”json”>{ “entries”: { “entry”: [ { “state”: “$state_column_name” } ] }}</result>
<param name=”jobCode” sqlType=”STRING”/>
</query>
“id” — unique name of the query
“useConfig” — value of “id” attribute from the first “config” tag in the XML
<sql>SQL query executed on database defined in datasource</sql>
“?” — input parameters for query defined in <param> tags at the bottom (ordered)
<result> is how a response of this query will look like — “entries” and “entry” are static parts but then you can define your keys (e.g. “state”) and use correct column names with char “$” (as a variable pointing to a specific column in database query result)
Because of errors from MySQL driver, I was able to make only SELECT operations in these queries. Solution for INSERT/UPDATE/… is to create MySQL functions and call them simply with “SELECT * FROM functionname(?) AS result”.
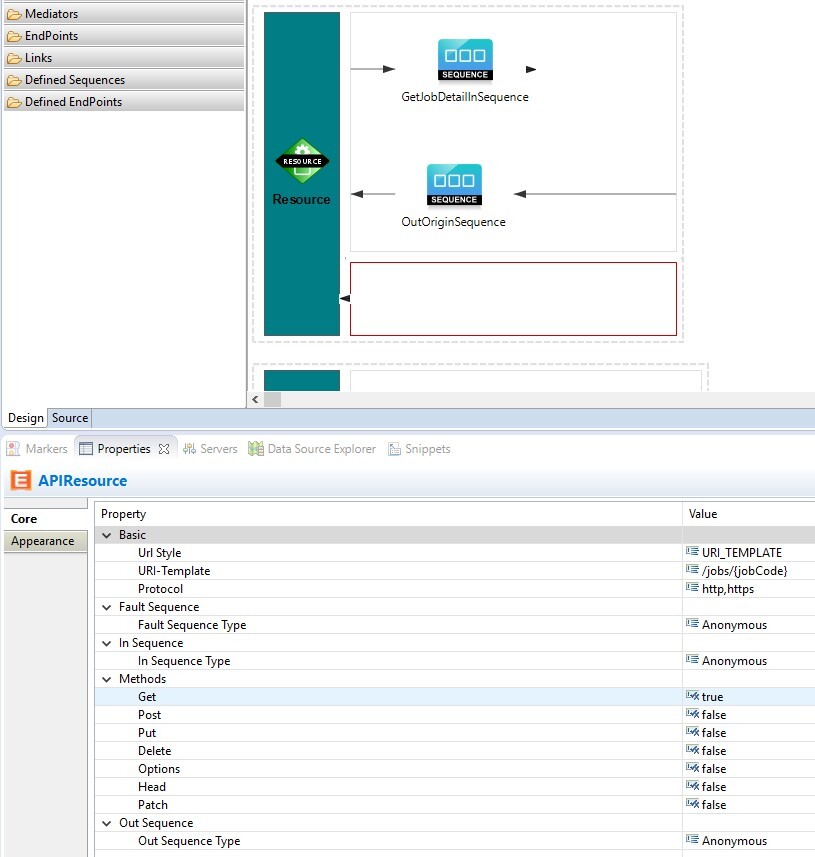
2. Create resource
The same applies for resource, I recommend to use XML instead of UI.
<resource method=”GET” path=”GetJobDetailResource/{jobCode}”>
<call-query href=”GetJobDetailQuery”>
<with-param name=”jobCode” query-param=”jobCode”/>
</call-query>
</resource>
“path” — URL path with parameters in braces
“href” — name defined in the previous step
“name” — name of the parameter
“query-param” — name of the query parameter (TIP: use same names for both types of parameters so you don’t need to worry which is the correct one)
Despite the fact that it’s against the REST API rules, I recommend to use GET method for all requests. I was not able to make one working request with POST because of constant errors. With GET a had no issues.
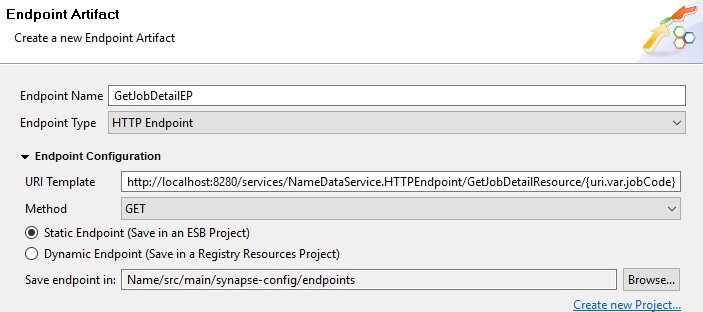
3. Create endpoint
In Project Explorer right-click project “Name” (first one), select New — Endpoint.

“Endpoint Name” — unique name
“Endpoint Type” — HTTP Endpoint
“URI Template” — there is a difference in parameters syntax (uri.var. part is necessary)
4. Create sequence
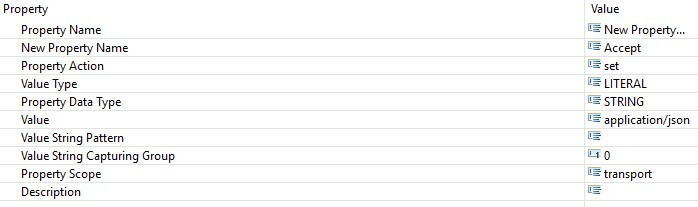
In Project Explorer right-click project “Name” (first one), select New — Sequence. Drag and drop mediators from left menu. If you want to use JSON, add Propery mediator and configure it.
Mediators are where your backend business logic is. You can modify, store, drop, clone, log, … a message. With Node.js server you write controller, with WSO2 you drag, drop and configure mediator. There are plenty of mediators and you can even create your own with Java but it’s not recommended as there are so many of them you just need to find a proper way how to use them.
Then add Send mediator and drag and drop correct endpoint from “Defined EndPoints”.
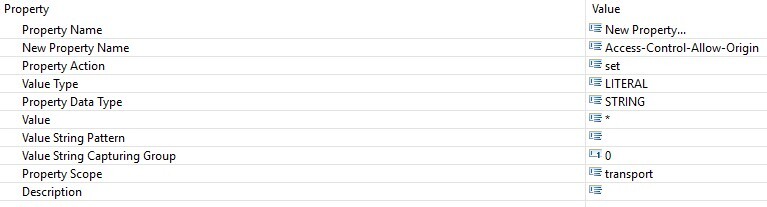
If your requests will be called from JavaScript front-end using web browser (or everything that falls under CORS rules) you will need to create OUT sequence similar to this IN sequence (just omit the endpoint and leave the Send mediator blank) with the following settings. I named it “OutOriginSequence”.
5. Create REST API
In Project Explorer right-click project “Name” (first one), select New — REST API.
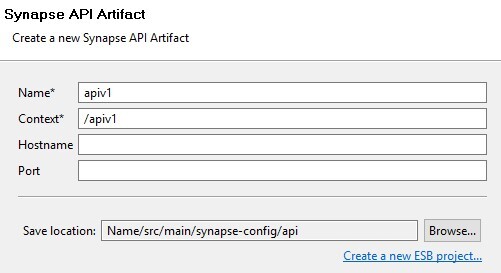
“Name” — unique name
“Context” — part of the URL after port number or top level domain (http://192.168.1.1:8280/apiv1/…)
From left menu drag and drop “APIResource”, then IN sequence and OUT sequence.
Export/Import Carbon Application
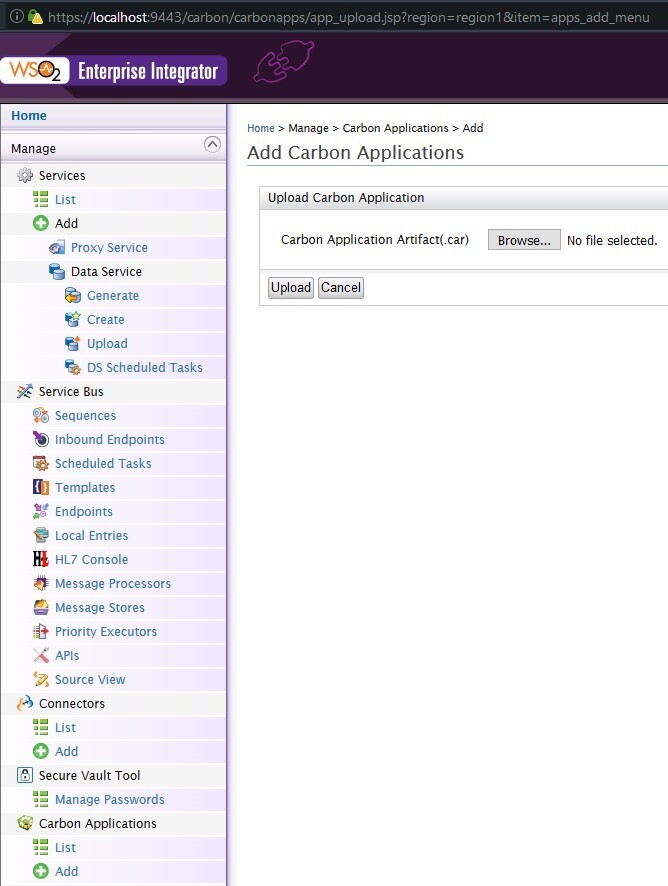
In Project Explorer right-click “NameCompositeApplication” and select “Export Composite Application Project” from context menu. Check “Name” from Artifacts menu. Sometimes checkbox is indeterminate which means that some artifacts inside “Name” are not selected — you should select them. Click “Finish” and save *.car file.
In Web UI delete already deployed application (if there is any) in left menu — Carbon Application — List — Delete. Then select “Add” from menu and browse for *.car file, click Upload.
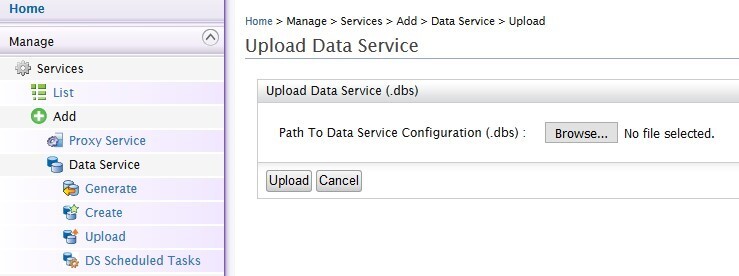
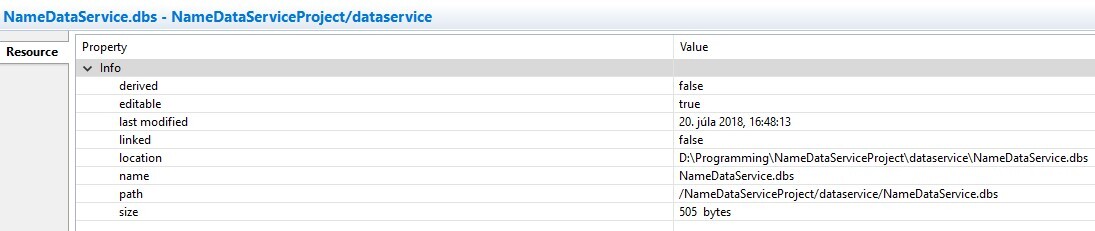
Export/Import Data Service
Doesn’t need to be exported because we can directly use *.dbs file located on “location”.
In web UI delete already deployed services (if there are any) from left menu — Services — List — Delete.
Then in left menu select Data Service — Upload.